
Inventory Items must be entered before you can insert a Cut Ticket.
Go to Menus > Production
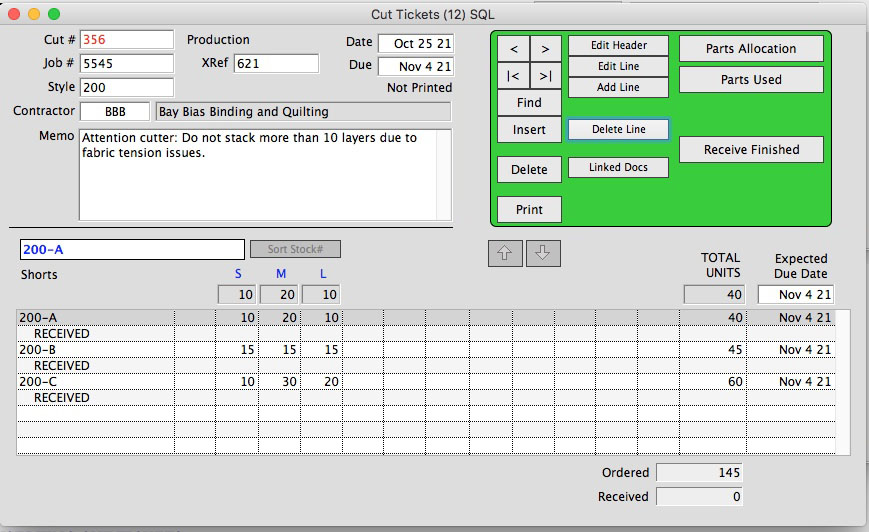
The Cut Ticket window will open.
Click on Insert.
A Cut Ticket number will be automatically assigned.
Enter the style number (The first part of the Stock number), then tab.
All items in this style will be loaded in the list at the bottom of the Cut Ticket window.
Enter the Contractor name, then tab.
Anything typed in the memo field will print on the Cut Ticket. You are not required to insert a memo.
Today’s date is automatically entered, but can be changed during Cut Ticket Insert, or by Editing the Cut Ticket later.
Due: Date 7 days from today’s date is automatically entered. This can also be changed during Cut Ticket Insert, or by Editing the Cut Ticket later.
Tab to Stock # list.
Type quantity to cut in each size bucket.
Use the tab key or the mouse to move through sizes and stock numbers.
Click OK when done.
If you have the Parts Tracking Module, A dialog box will pop up: “Allocate Parts Now?”
If you do not want to allocate parts, or Components are not entered for this style, click NO. You will be able to allocate parts later. To allocate parts, see the Guide Article: Parts Allocation.
There are number of other methods to automatically build a cut ticket from customer orders, by batches or individual linking.
Revised: AG 10/25/2021
Copyright © AS Systems, All Rights Reserved | WordPress Development by WEBDOGS