There are a number of different ways of taking physical inventory and updating the quantities in PERFECT FIT. This is one example, and you can develop your own variations. The sequence here is not totally strict, either. This method uses a spreadsheet to gather data, and will do the update by importing data. It leaves a complete trail of the process in the Movements file.
Note: If you’re using multiple inventory locations you must process each location separately.
1)
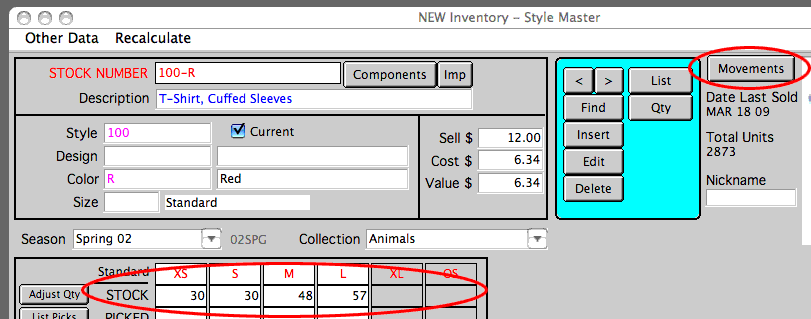
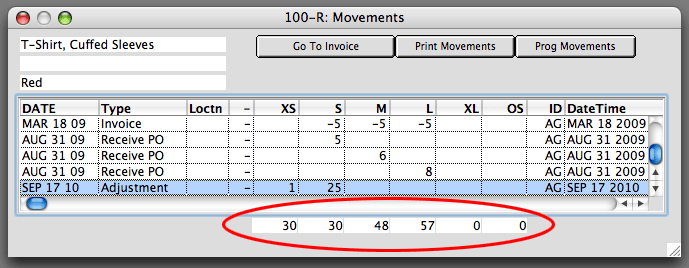
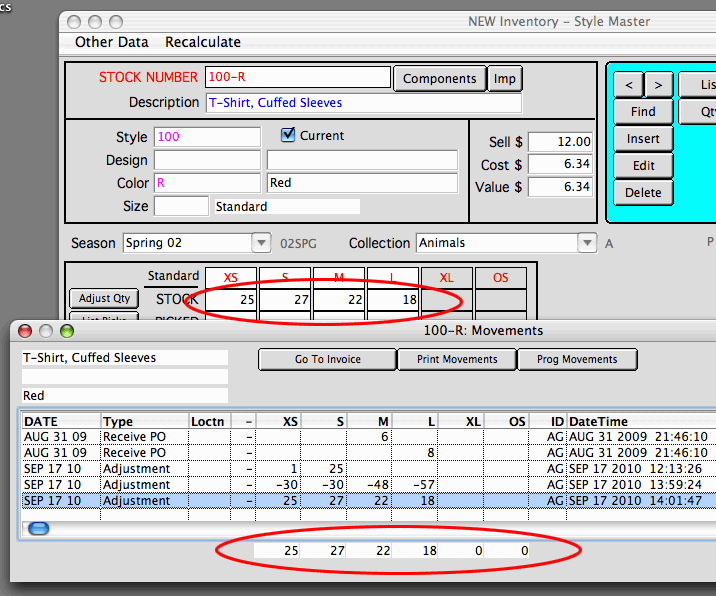
You must understand the relationship between the Quantities in Stock on the Style Master window and the totals shown on the Movements window. Under normal conditions they should always match exactly, but due to edits in the programmer’s windows, computer crashes, network failures, or bad imports, they may not agree. This is the prefect time to bring them into agreement. We make the assumption that the Movements file is the correct number, as this is substantiated by source documents (Purchase orders, Invoices, etc.) That procedure is shown in step 9, and can be done then, or at the beginning of this process.
These 2 windows show that the quantities do agree for stock # 100-R.
2)
Items in the warehouse can be counted using a bar code scanner if your inventory system has been set up to do that, or in this case we will use pen and clipboard. In either case, we want to end up with a spreadsheet that holds the physical inventory count.
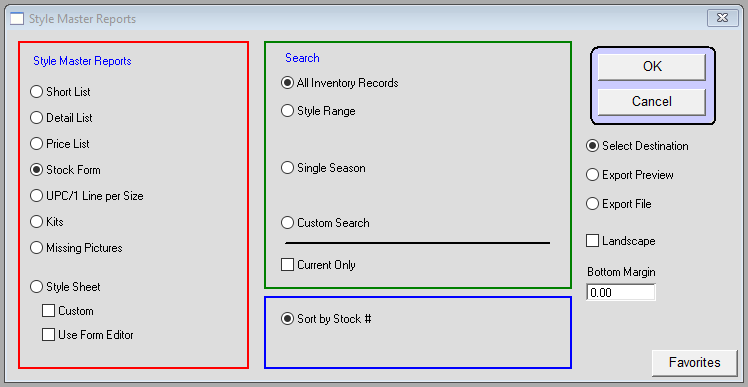
Menus > Inventory Reports > Finished Inventory You can print a Stock form that is designed for manual recording of quantities. Notice that “Entire File” is selected, as you should record items that are not marked as current also (your option, of course).
(Step 4 shows an alternate way of creating a Stock Form using a spreadsheet.)
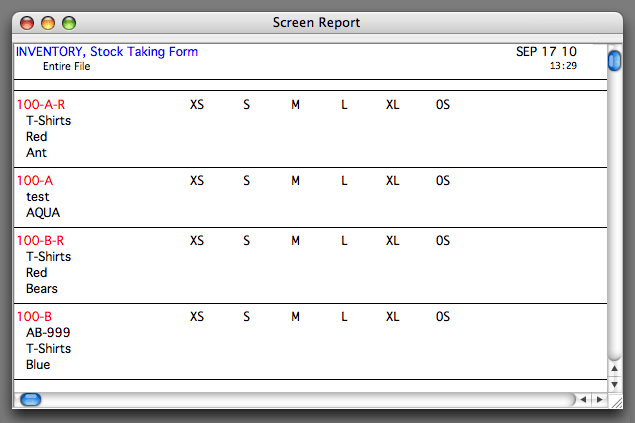
The Stock Taking Form, but it needs to be printed on paper:
3)
Count your physical inventory.
4)
Create a spreadsheet template that will hold your physical count, and is set up for import into PERFECT FIT.
Note that this form is in a spreadsheet file and can be modified to make a count sheet look the way you want.
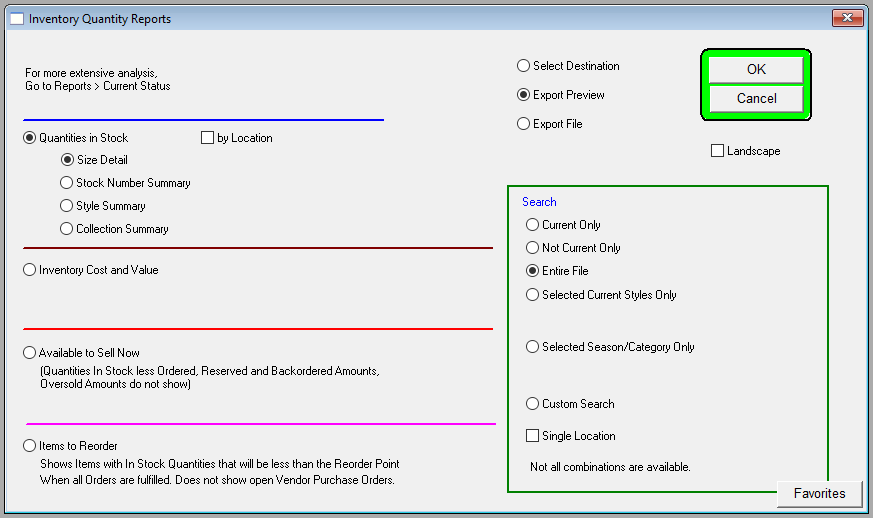
Under Menus > InventoryReports > ..Quantities
Select Quantities in Stock, Size Detail, and Entire File. Additionally choose Export Preview as an initial output.
5)
Your preview may generate many more columns than are necessary. If so, you will need to click the “Columns” button to only leave a green check on the four columns noted below.
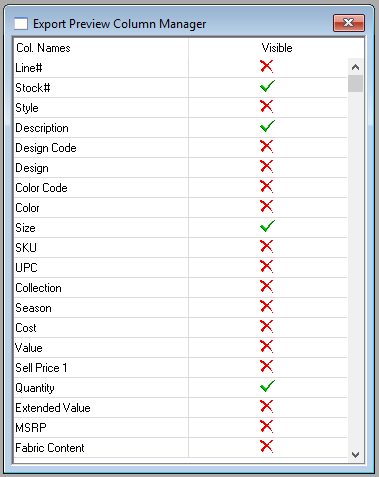
IVNUM = Stock # IVDESC = Description IS_x = Size *The specific size (this is stored in different “slots” in PF, hence the lower case “x” in the name). IVSx = Quantity *The quantity in stock
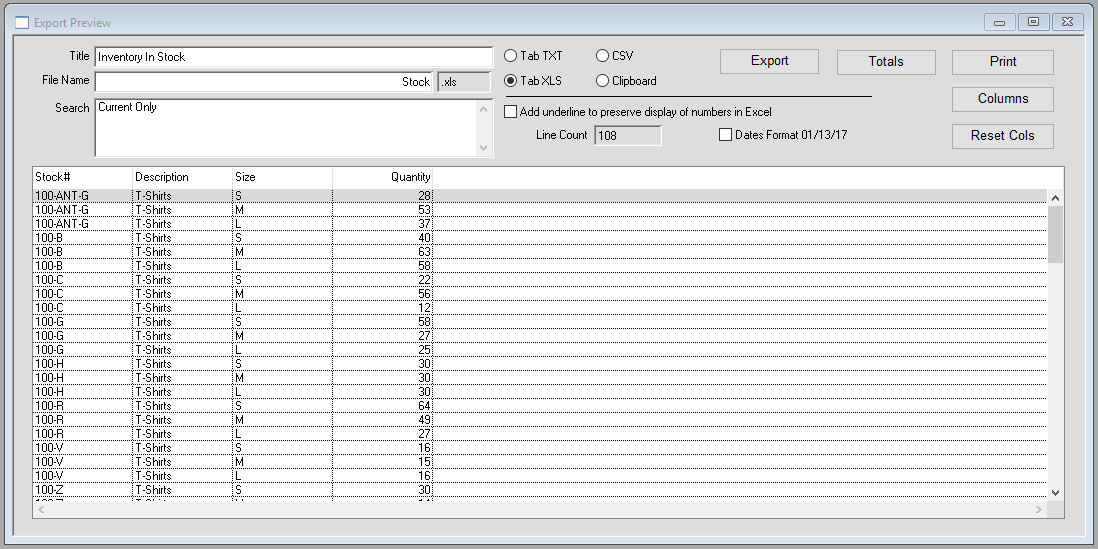
Save the exported file on your desktop. It will have a default name of Stock.txt .
6)
Tell PERFECT FIT to record your inventory quantities as they are before making adjustments.
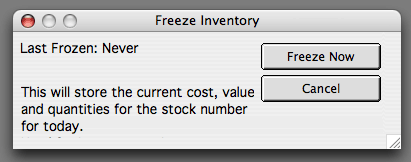
The Freeze Quantities command records current inventory values in a separate file that does not change. It is date and time stamped as a “snapshot” of your inventory quantities and value.
This can be used in Variance reporting later on.
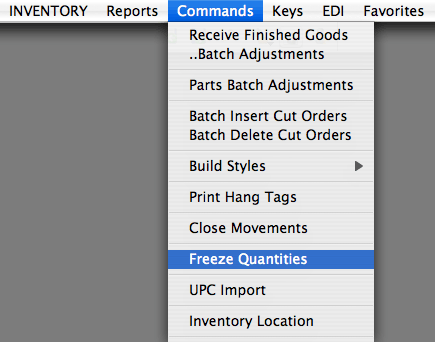
Click “Freeze Now”.
7)
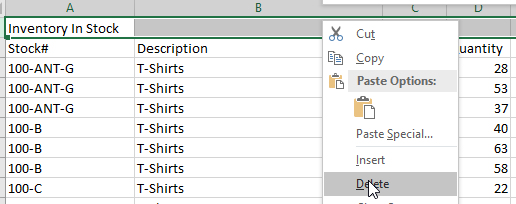
Highlight and REMOVE the first line of the spreadsheet which is the title line. You will be left with just the header row and all items
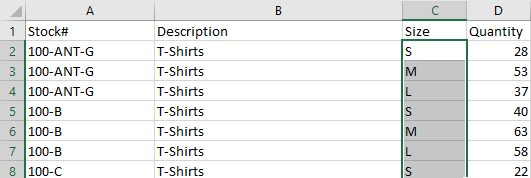
Enter into your spreadsheet, in the IVSx column (Size), the quantities from your current count.
You might want to clear the column before starting so you won’t lose your place.
(IVSx stands for Inventory Stock in size slot x, where x can be 1 to 12. You do not need to be concerned with the slot number since you have the size specified already.)
8)
Remove the first ROW of the spreadsheet so you will not import the field headings. Remove the IVDESC column. PF already has that data. You will end up with a spreadsheet that has 3 columns ONLY, in this order. IVNUM, IS_x (Size), and IVSx (Quantity)
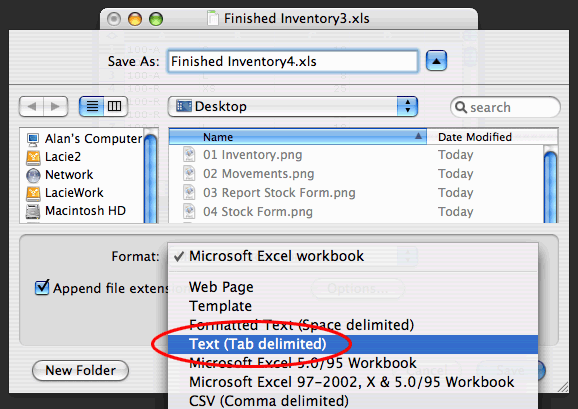
Save your finished spreadsheet as a TAB DELIMITED TEXT document. This will allow PERFECT FIT to read the data.
9)
Before importing, reconcile the movements file as described in Step 1, if you have not done it already. Menus > Maintenance > *PROG* > Inventory Procedures 2 > Calculate STOCK from MOVEMENTS
This can take a few hours to run on a large data file. Closing Inventory Periods will reduce the time it takes to run.
If you do want to close inventory periods, do it before this step. That will save time.

10)
Since we will be bringing in total counted quantities, we must zero out the existing inventory in PERFECT FIT.
Go to Inventory > Commands > Batch Adjustments
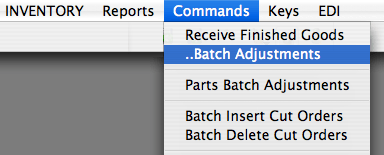
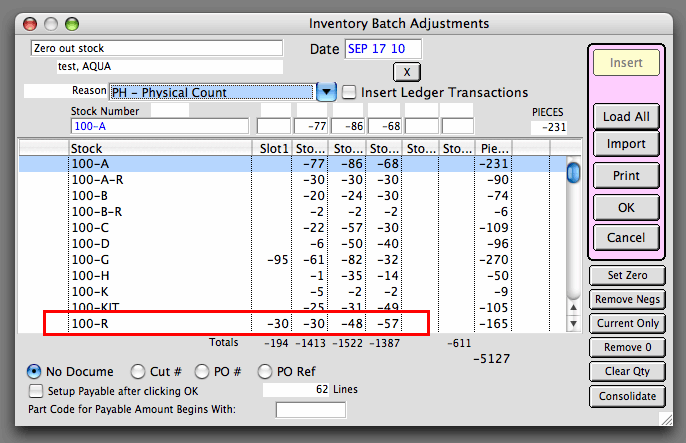
Click Insert, then click Load All to display the entire inventory file, then click Set Zero.
Set Zero will load the list with proposed adjustments that will zero out the inventory. Notice that the stock # 100-R has negatives for all the sizes in stock that are shown at the top of this page.
If you have lots of items that are showing zeros, and you want to reduce the size of the list to view only those items that will be adjusted, click the Remove 0 button. This updates the display by removing the lines that are all zeros.
The memo will default to “Zero out stock”. Select an Adjustment Reason. I previously set up “Physical Count” as an adjustment reason under Inventory > Definitions > Adjustment reasons.
Click OK to process the adjustments.
After doing this you can spot check the inventory and Movements window to see that there is now nothing in stock.
11)
Go to Inventory > Commands > Batch Adjustments
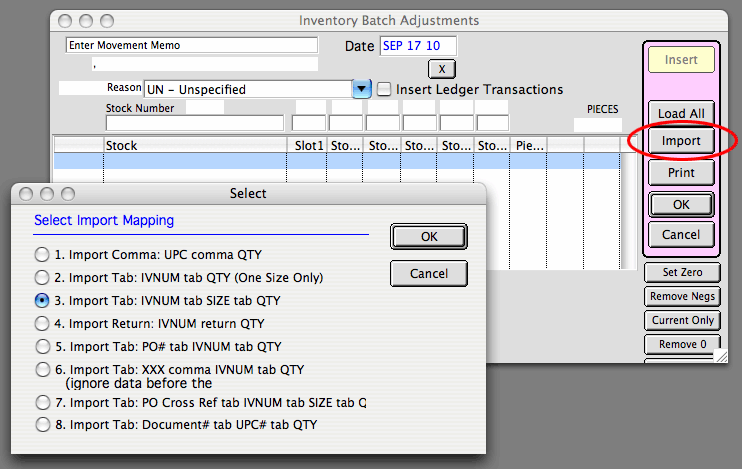
Click Insert, Click Import. Select option #3 (that is the way we set up the spreadsheet).
Click OK, and you will be prompted to open the txt file we saved in step #8, above. When loading the file into the list, there is some error checking. We have seen problems, for example, when a size is “2/3”
Excel may want to read this as Feb 3, not 2/3! You will have to format your columns for TEXT only, and make sure the tthe txt file that is saved shows the true size name.
12)
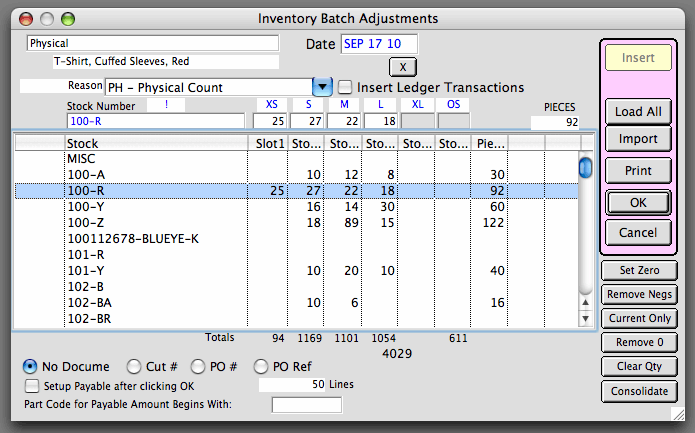
Enter the memo “Physical”, and select the Adjustment Reason “Physical Count”. The Batch Adjustment window will look something like this.
Notice the quantities of 100-R correspond the the numbers we entered on the spreadsheet, all in the correct size slots.
Click OK to process the adjustments
13)
Take a look at a stock number and the associated movements so you can see the results of the inventory update.
The Inventory Movement window shows the final adjustment, which is the physical count from your spreadsheet.
14)
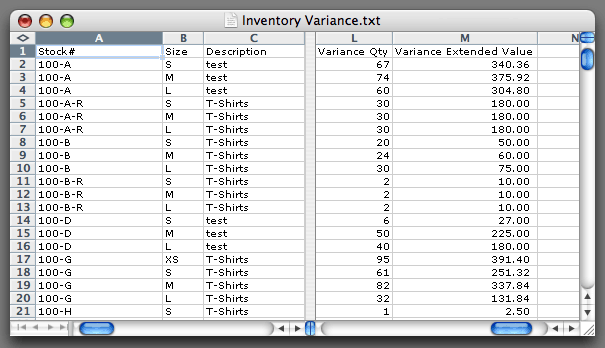
If you want to see how far off your physical count is from your previous numbers in PERFECT FIT, run the Inventory Variance Report.
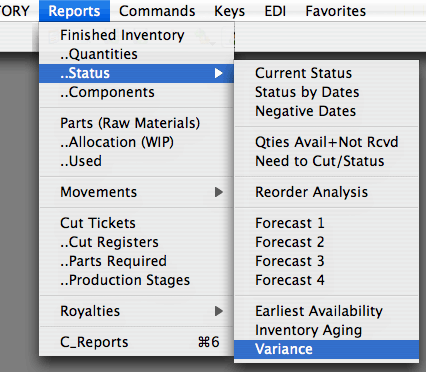
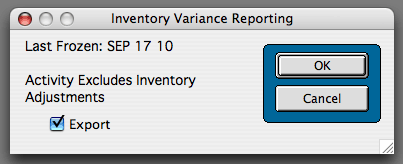
This option will send it a tab delimited file so it can be opened in a spreadsheet. It is a very wide report so this way you can see all the columns.
Done!
Last revision: AG, 1/24/12, GE 01/04/18
Copyright © AS Systems, All Rights Reserved | WordPress Development by WEBDOGS