There are a number of different ways of taking physical inventory and updating the quantities in PERFECT FIT. This is one example, and you can develop your own variations. The sequence here is not totally strict, either. This method uses a spreadsheet to gather data and will do the update by importing data. It leaves a complete trail of the process in the Movements file.
Note: If you’re using multiple inventory locations you must process each location separately.
1)
Items in the warehouse can be counted using a bar code scanner if your inventory system has been set up to do that, or in this case we will use pen and clipboard. In either case, we want to end up with a spreadsheet that holds the physical inventory count. Menus > Inventory Finished Goods > Reports > Finished Inventory You can create a Stock form that is designed for manual recording of quantities by creating a new variation.
Click on Standard > New Variation.
Notice that “Entire File” is selected, as you should record items that are not marked as current also (your option, of course).
(Step 4 shows an alternate way of creating a Stock Form using a spreadsheet.)
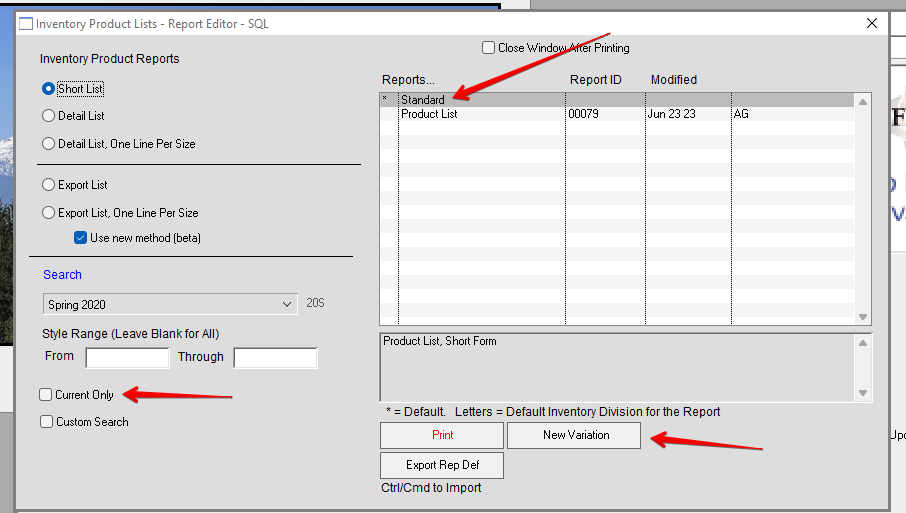
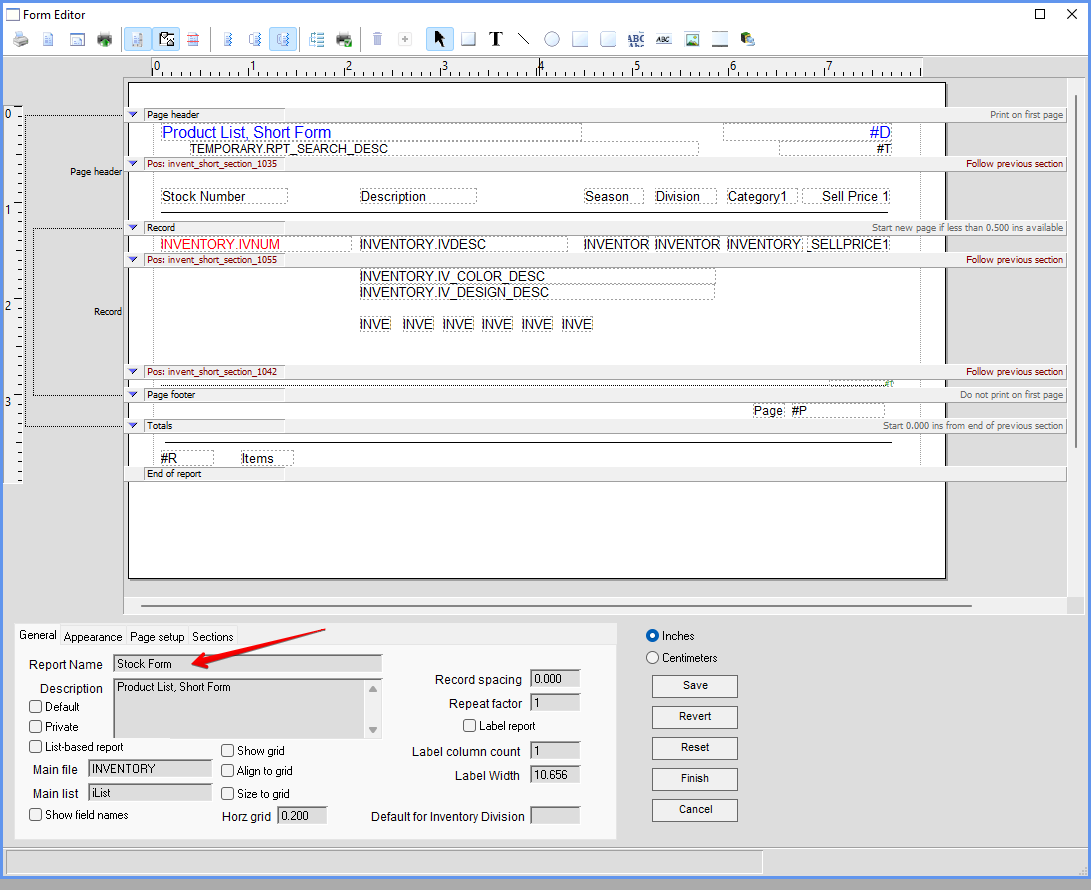
The form editor will appear, and you can create a custom form and Name it. Please call us for assistance if you have any questions.
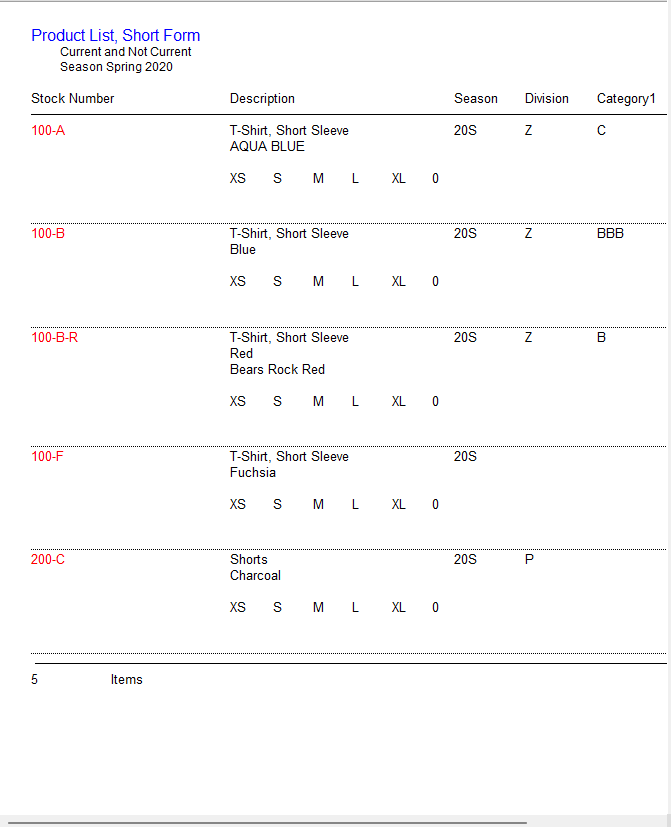
The Stock Taking Form, but it needs to be printed on paper. This form has one season selected, but you can select all:
3)
Count your physical inventory.
4)
Create a spreadsheet template that will hold your physical count, and is set up for import into PERFECT FIT.
Note that this form is in a spreadsheet file and can be modified to make a count sheet look the way you want.
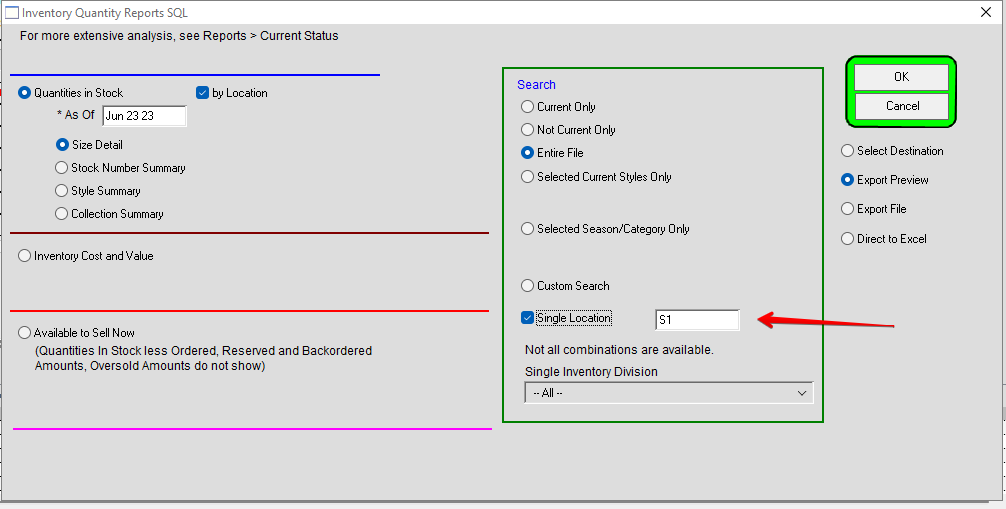
Under Menus > Inventory Finished Goods > Reports > …Quantities
Select Quantities in Stock, Size Detail, and Entire File. Additionally choose Export Preview as an initial output.
If you have multiple locations, please choose the inventory location you want. Inventory must be imported by location.
5)
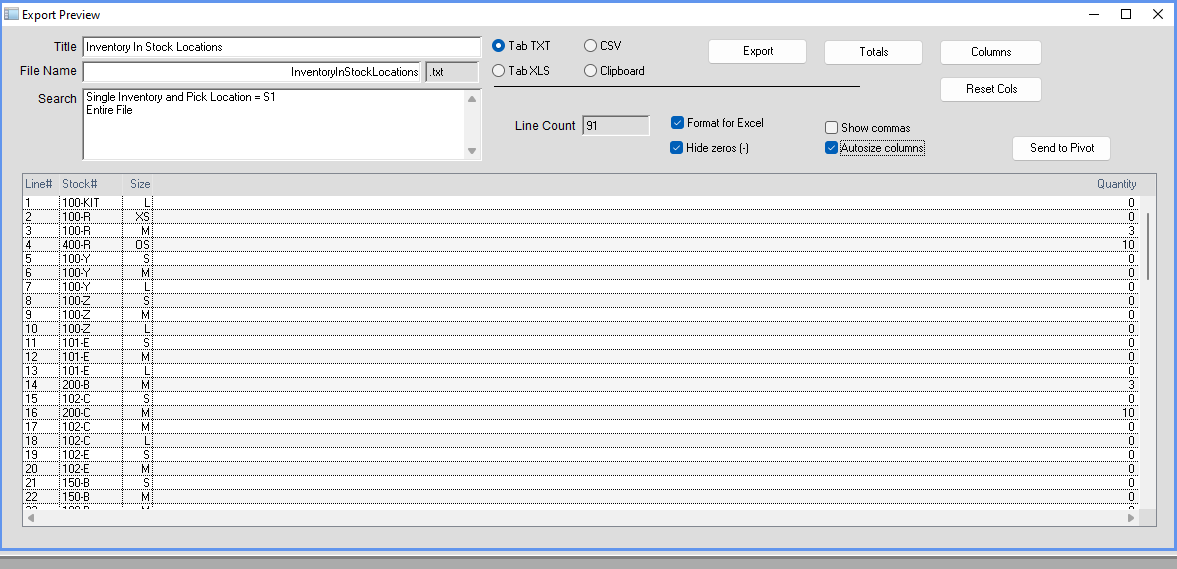
Your preview may generate many more columns than are necessary. If so, you will need to click the “Columns” button to only leave a green check on the four columns noted below.
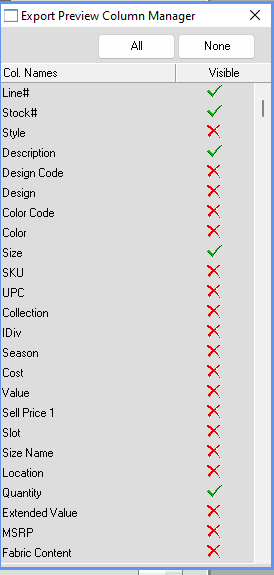
IVNUM = Stock # IVDESC = Description IS_x = Size *The specific size (this is stored in different “slots” in PF, hence the lower case “x” in the name). IVSx = Quantity *The quantity in stock
Save the exported file on your desktop or your preferred folder. It will have a default name of InventoryInStockLocations.txt Keep this File as a backup until all data looks good.
6)
NOTE: If you want compare records before and after your counts you will need to freeze your inventory. If not you can skip this step.
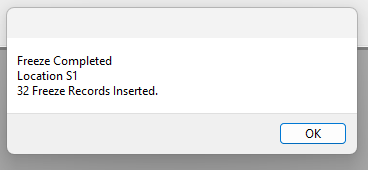
Tell PERFECT FIT to record your inventory quantities as they are before making adjustments.
The Freeze Quantities command records current inventory values in a separate file that does not change. It is date and time stamped as a “snapshot” of your inventory quantities and value.
This can be used in Variance reporting later on.
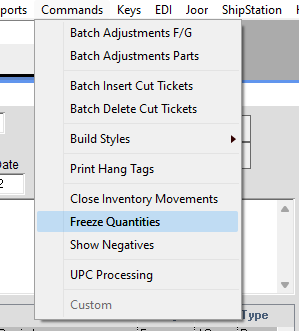
Be Sure to Freeze the Correct Location
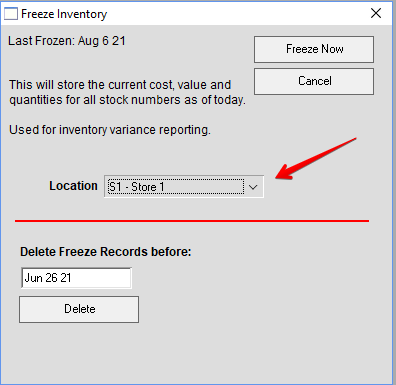
Click “Freeze Now”.
7)
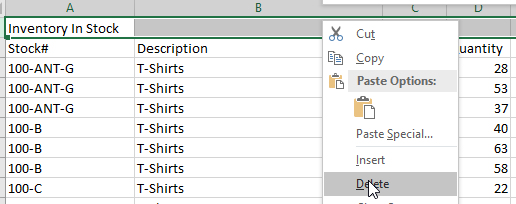
Highlight and REMOVE the first line of the spreadsheet which is the title line. You will be left with just the header row and all items.
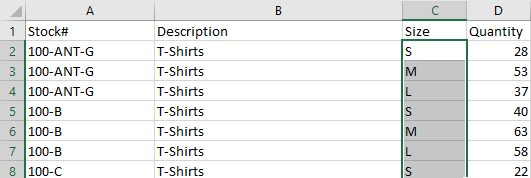
Enter into your spreadsheet, in the IVSx = Quantity, the quantities from your current count.
You might want to clear the column before starting so you won’t lose your place.
(IVSx stands for Inventory Stock in size slot x, where x can be 1 to 12. You do not need to be concerned with the slot number since you have the size specified already.)
8)
Remove the first ROW of the spreadsheet so you will not import the field headings. Remove the IVDESC column. PF already has that data. You will end up with a spreadsheet that has 3 columns ONLY, in this order. IVNUM, IS_x (Size), and IVSx (Quantity)
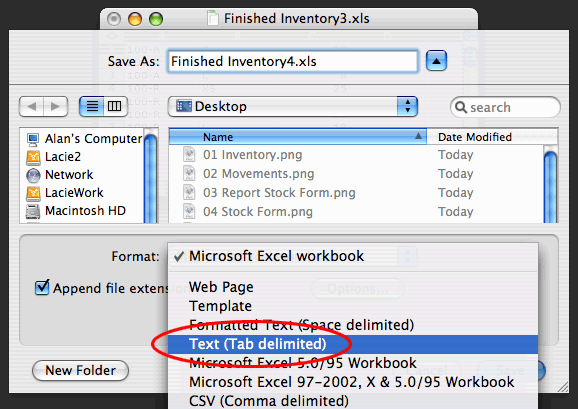
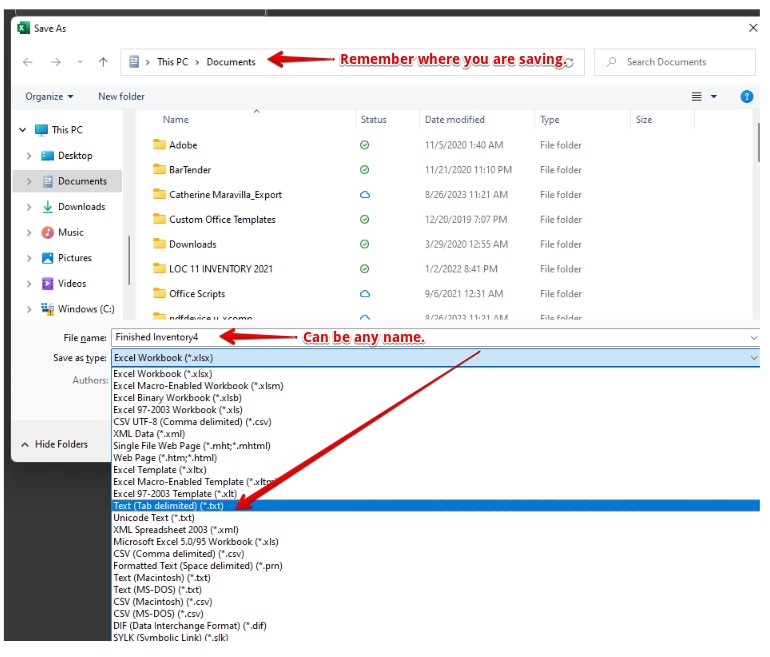
Save your finished spreadsheet as a TAB DELIMITED TEXT document with a new name (Ie. Finished Inventory import). This will allow PERFECT FIT to read the data.
Windows Screenshot.
(Recommend you keep a copy of original exported data).
9)
Since we will be bringing in total counted quantities, we must zero out the existing inventory in PERFECT FIT.
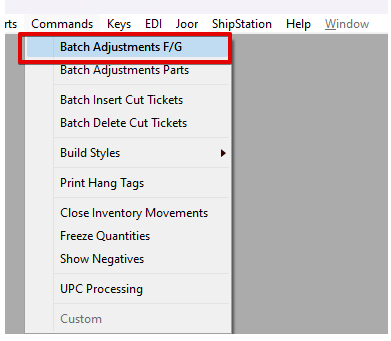
Go to Inventory > Commands > Batch Adjustments
Click Adjust, then click Load Qties in Stock to display the entire inventory file, then click Set Zero.
Set Zero will load the list with proposed adjustments that will zero out the inventory. Notice that the stock # 100-R has negatives for all the sizes in stock that are shown at the top of this page.
Add a note in the Memo Section (I.e., Zero out Stock YE). Select an Adjustment Reason. This is a PHY- Physical Inventory. You can set you own under Inventory > Definitions > Adjustment reasons. Insert adjustment reason.
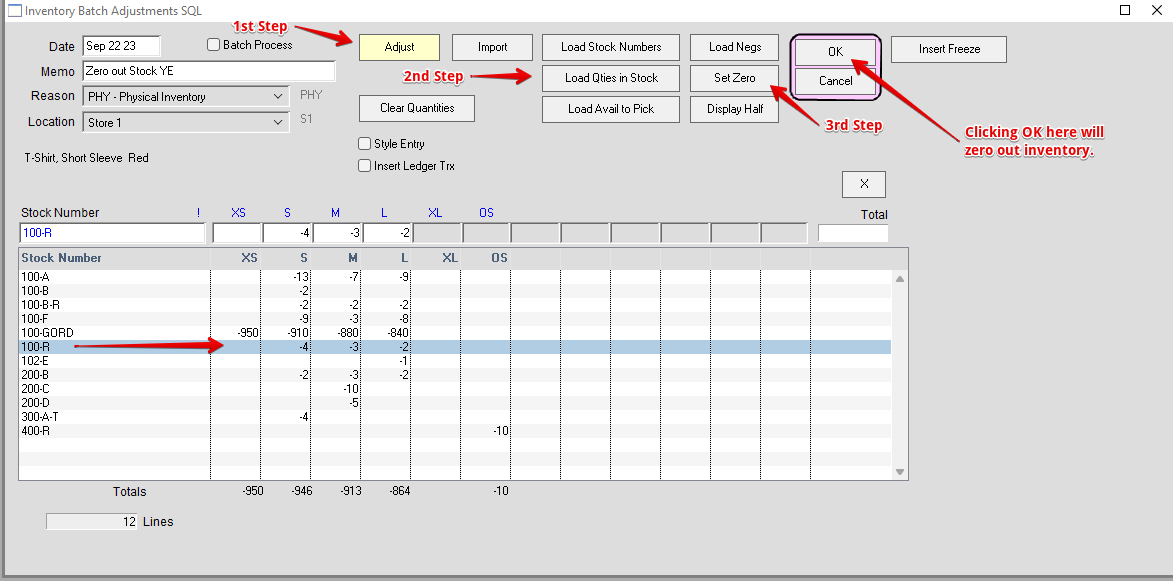
Click OK to process the adjustments.
After doing this you can spot check the inventory and Movements window to see that there is now nothing in stock.
10)
Go to Inventory > Commands > Batch Adjustments F/G
Click Adjust, Click Import. Select option that you saved your data in. In this case we are importing the data based upon PF SKU Tab delimited.
(Importing by UPC tab QTY is very common).
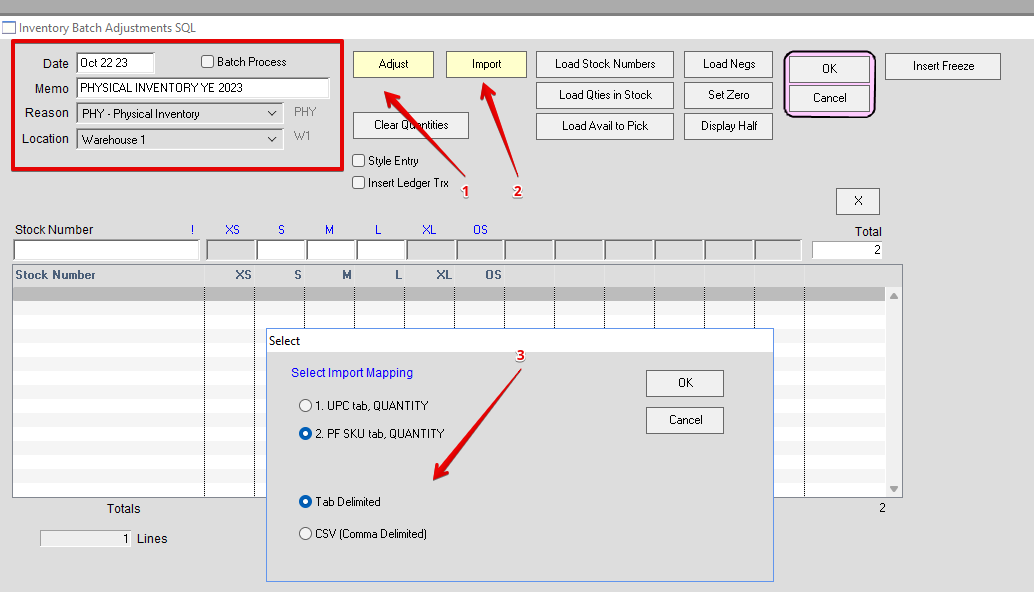 Click OK, and you will be prompted to
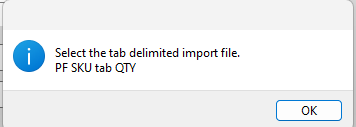
Open the txt file we saved in step #8, above.
When loading the file into the list, there is some error checking. We have seen problems, for example, when a size is “2/3”
Excel may want to read this as Feb 3, not 2/3! You will have to format your columns for TEXT only, and make sure the the txt file that is saved shows the true size name.
If your spreadsheet has data that does not exist in Perfect Fit, you will get the below error message. This is more common when importing UPC numbers. Perfect Fit will not import PF SKU or UPC numbers that do not exist in Perfect Fit.
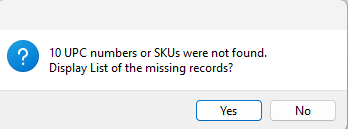

Review displayed errors. You can add items into Perfect Fit and re-import or ignore.
12)
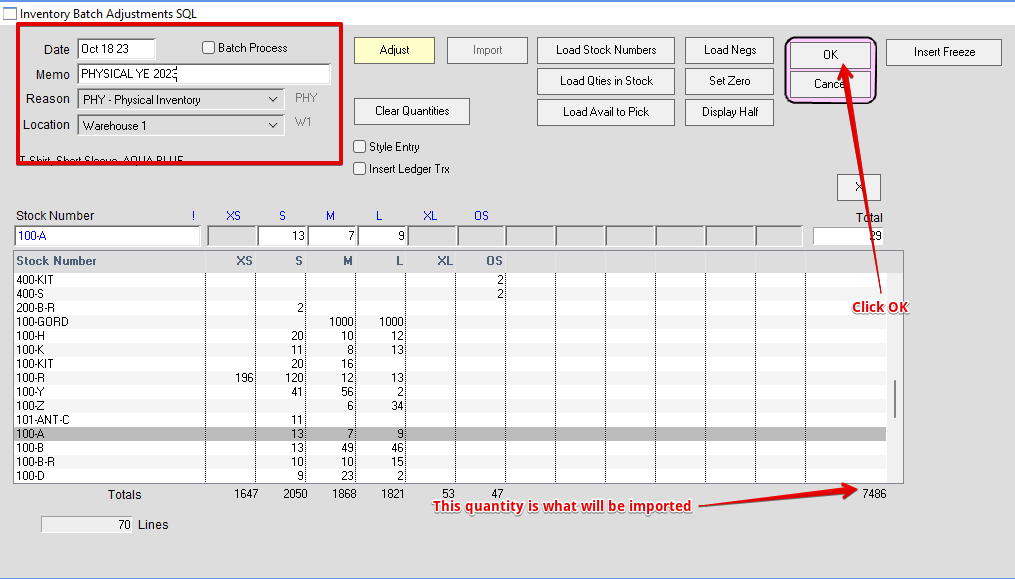
Enter the memo “Physical” or another description and select the Adjustment Reason “Physical Inventory”. The Batch Adjustment window will look something like this.
Notice the quantities of 100-A correspond the numbers we entered on the spreadsheet, all in the correct size slots.
Click OK to process the adjustments.
13)
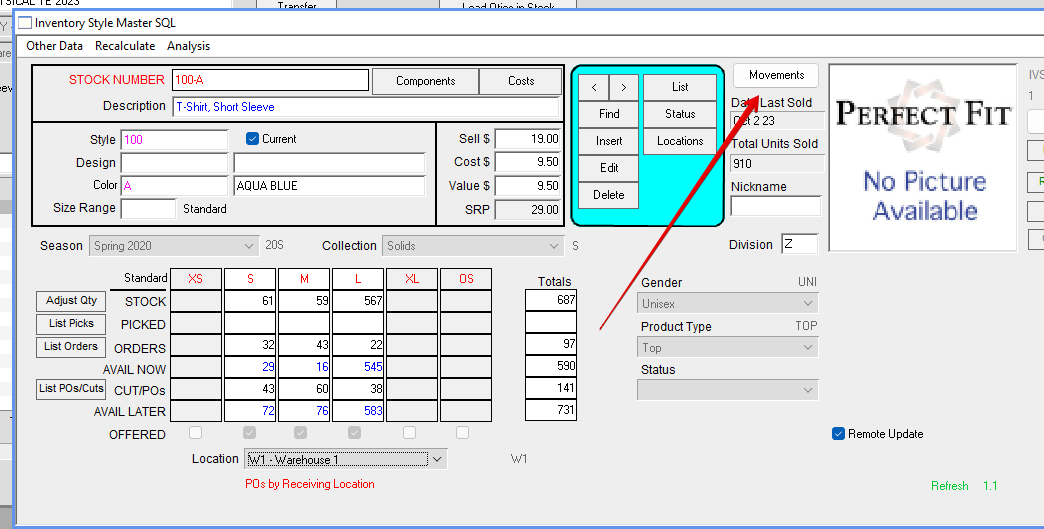
Take a look at a stock number and the associated movements so you can see the results of the inventory update.
The Inventory Movement window shows the final adjustment, which is the physical count from your spreadsheet.
14)
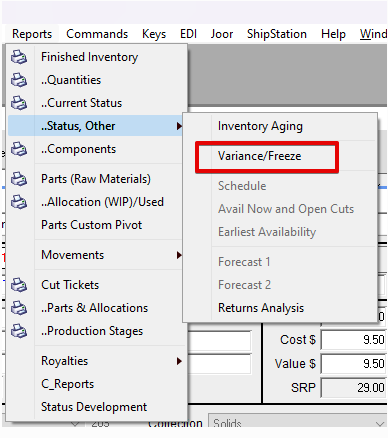
If you want to see how far off your physical count is from your previous numbers in PERFECT FIT, run the Inventory Variance Report.
Enter the Freeze Date Range and Location. Then Pick your destination, export or direct to excel.
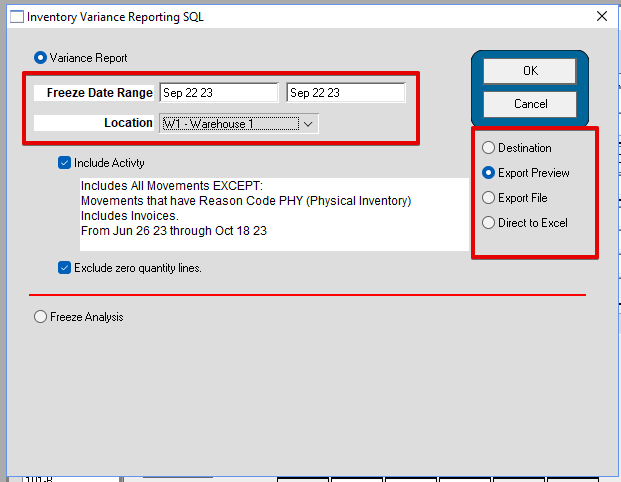
This option will send it a tab delimited file so it can be opened in a spreadsheet. It is a very wide report so this way you can see all the columns.

Done!
Last revision: AG, 1/24/12, GE 01/04/18, HS 10/18/23
Copyright © AS Systems, All Rights Reserved | WordPress Development by WEBDOGS