
The Recurring Bills window can be accessed via Menus > Checks/Payables > Checkbook > ..Recurring Bills
In the window that opens, the left pane lists your recurring bills. The middle section allows you to enter the payable info and schedule. The right side of the window has buttons that allow you to insert, edit, and delete recurring bills.
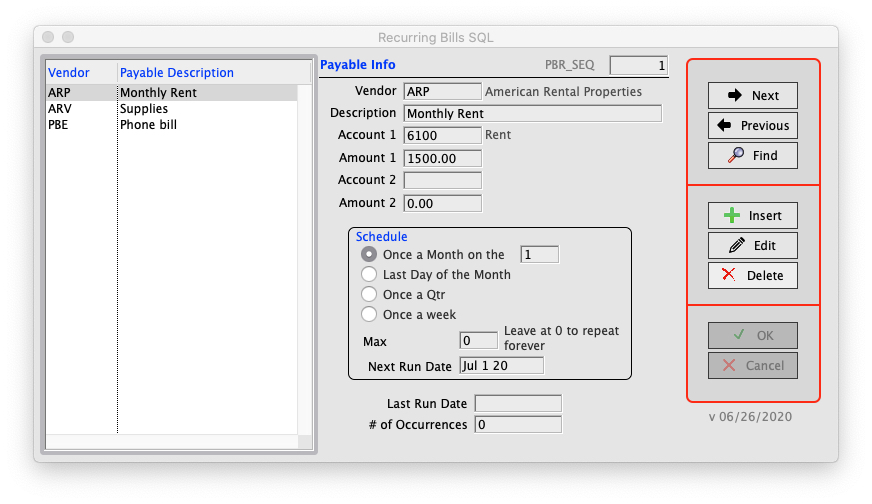
To insert a new recurring bill press the Insert button and fill in the Vendor code (who the bill will be made to). Continue by entering a description of the bill, the ledger account to offset, and the amount of the bill. *Optionally, if you want the bill to be paid from two ledger accounts you can fill in the Account 2 and Amount 2 fields in addition to the Account 1 and Amount 1 fields.
After you’ve finished entering the Payable Info, you will need to enter the Schedule criteria. Select the desired option and note that if you choose “Once a Month on the” you will have to enter a number in the field next to the selection. That number represents the day of the month the bill is to occur. Also, fill in the Max Occurrences which denotes how many times you want the bill to reoccur (leave at “0” if you want the bill to reoccur indefinitely). When you’re done, press OK.
The Next Run Date field shows the next time the bill is scheduled to occur. When you log in to Perfect Fit, after the next scheduled bill recurrence, and access the Vendor menu you will be prompted to enter the bill.

Click Yes and a bill will be entered, which can be viewed via Menus > Checks Payables.
*If you have purchased the Security module you will be able to control access to the recurring bills feature. The Security module is not needed to use recurring bills, only to modify access.
Copyright © AS Systems, All Rights Reserved | WordPress Development by WEBDOGS