Sorry for the old screen shots. PF8 has been updated.
There are many ways to use the Perfect Fit production module. We have outlined a production scenario below. We recommend you run it on the test data file so you can become familiar with the features we have in PF. It is a great way to learn the system.
For this example, we will buy materials and cut/sew the blanks first and then issue a PO for overdyeing. In order to start this process, we assume the customer orders have been inserted and the Bill of Materials (BOM) and Components are set up.
The base stock number must be entered under the Style Master > Other Data > Notes window for the Finished Good (embellished style #). The vendor codes must be entered in Stylemaster > Other Data > Purchasing.
Go to > Menus > Orders. If you are not producing items for a specific order this window does not have to be open. Open the order window and find the order.
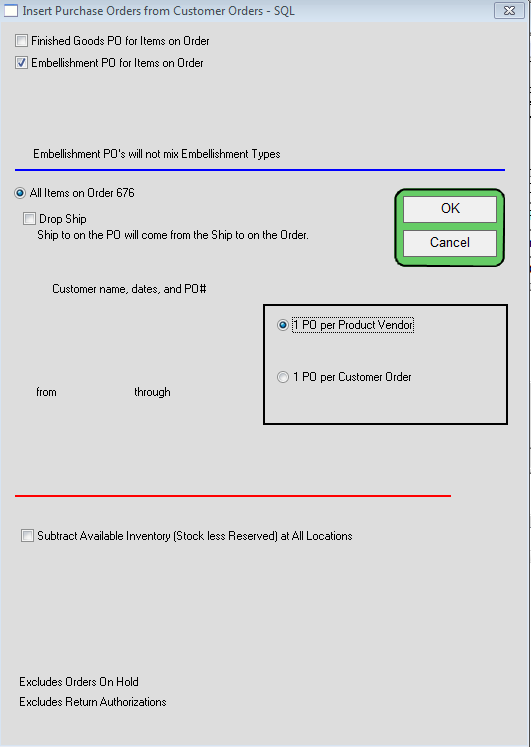
On the menu bar go to > Commands > Options > Create Purchase Orders. A window “Insert PO from Customer Orders” will open. Choose “Embellishment PO for Items on Order” option. Click “All Styles on Order 361” and “Order info to PO memo”. Click “1 PO per Vendor”. Click OK.

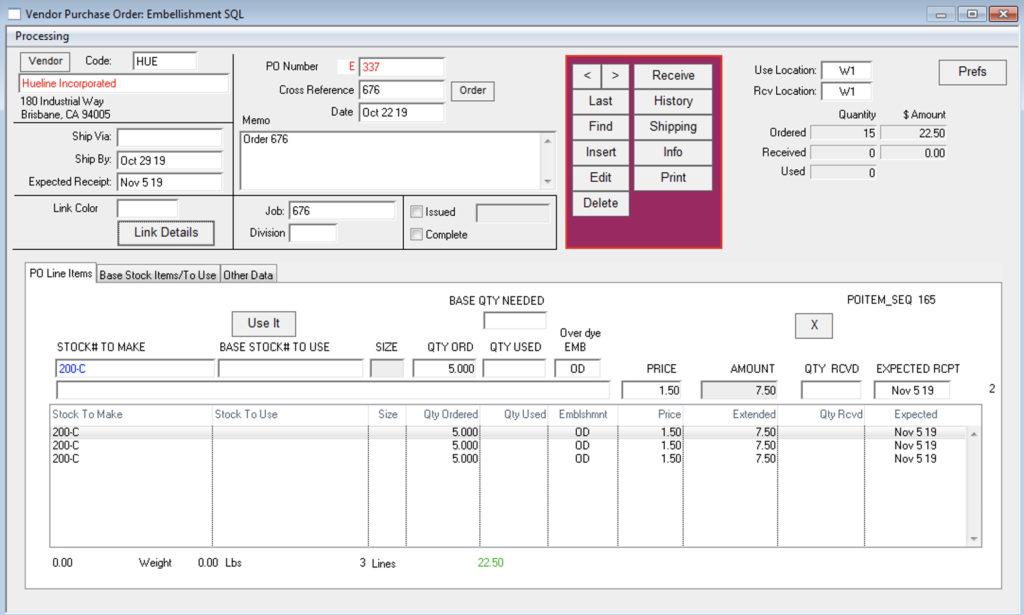
A PO for Embellishments will open with the customer order items. Enter the expected receive date. Click OK. Do not click the “Use It” or “Issued” button at this time.

On the PO go to the Processing Menu > Insert Cut Tickets for Blanks. A cut ticket is automatically inserted with the styles from the PO for embellishment. A message pops up “Save this Cut Ticket?” Click Yes. Click Edit to adjust the due date.

Click the Parts Allocation button to open the Parts Allocation.

Click the “Insert Purchase Orders” button. This will issue POs for the raw materials needed for this cut ticket. A message appears “3 Purchase Orders inserted. Go there now?” Click Yes. The first PO will open. Edit the POs for ship dates and click OK. Print the POs if needed for vendors. Note that you can edit the PO to adjust quantities.

When you receive the raw materials, go to Menus > Purchase Orders > Raw Materials and find the PO. Click the “Receive” button. Click the “All” and the “Receiving Complete” buttons if complete. You can issue a Payable at a later date.
When all the raw materials are received , go to the cut ticket and click the “Parts Allocation” button. Click the “Allocate All Parts” button. This reserves the raw materials for this cut ticket.

When you are ready to commit the raw materials, return to the cut ticket window and click the “Parts Used” button. The Parts Used window opens. Click the ” Adjust Allocation_Use” button. Two buttons will appear: “Load Alloc” and Load Used”.
The Load Alloc button removes the reserved items from allocation. The Load Used button is where you can make adjustments for the actual amount of raw materials used. Click OK when done. Print the cut ticket for the vendor if needed.

When you are ready to receive the cut ticket, go to Menus > Production and find the cut ticket. Click the “Receive2” button.

A window “Select” opens. Choose “Parts Used have already been processed. ” Click OK.

The window “Receive Items on Cut Ticket – Process Parts” opens. Click the “Receive” button and enter the date received. Entered the amount received. If the cut is complete, you can use the Balance button which will receive the balance of the cut ticket. Specify a location if you are using the location module. Data below the black line summarizes cut information.

Go to Menus > Purchase Orders > Finished Embellishment. Click “Use It.” Enter location if needed. Messages” Reduce Quantity of “To Use”? Choose Yes. Edit and click the “Issued” button. Print a copy for your vendor if needed.
When you are ready to receive the PO, go to Menus > Purchase Orders > Finished Embellishment and find the PO. Click the “Receive” button. Enter the amount received or “All’ if complete. Click OK.

When you are ready to ship the items, return to the PO for embellishments and click the “Order” button near the date. The order which is linked to this PO will appear. Go to > Pick > Insert Pick. A pick ticket will be inserted. Edit dates if needed. Tab through to reserve the items for this pick ticket. If you want to pick complete use the Reserve All button. Click OK. If needed for the vendor, print the pick ticket.

Once the items have been shipped, you can insert an invoice from the pick ticket window. Click “Insert Invoice”. Tab through and enter the invoice date, shipping info, terms, ship weight, and ship amount. Click OK.

If you have the UPS Manifest module, a window will open for Invoice Boxes: UPS. Fill in the information and click OK. The freight amount is inserted on the invoice automatically.

Copyright © AS Systems, All Rights Reserved | WordPress Development by WEBDOGS