You can control which Raw Material parts print on Cut Tickets. First you need to assign a stage to the part, then you need to modify the form
via the Form Editor.
Part A)
Menus > Inventory
Inventory > Parts (Raw Materials)
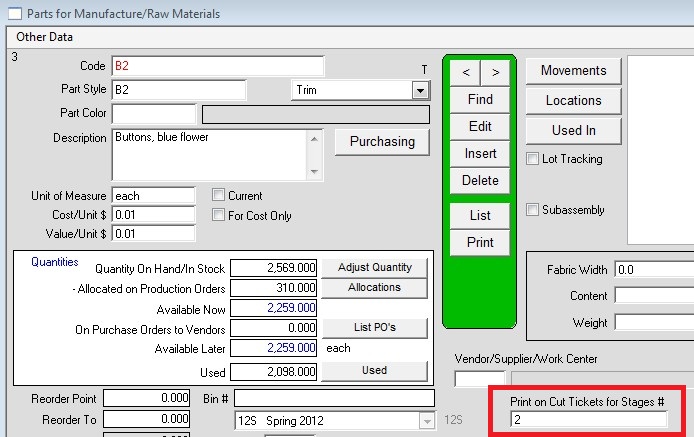
Click Edit then enter a number in the Print on Cut Tickets for Stages # field then click OK.
Multiples stages can be entered by separating them with a comma. i.e. 2, 4, 5.

Repeat that process for any other parts that you’ll want to show on the cut ticket printout.
Part B)
Menus > Production
Click PrintA button
Select the Cut Ticket and Components Print Summary Requires Parts Allocation File radio buttons
Click New Variation
Deselect the Show Paper icon in the top left of the menu bar

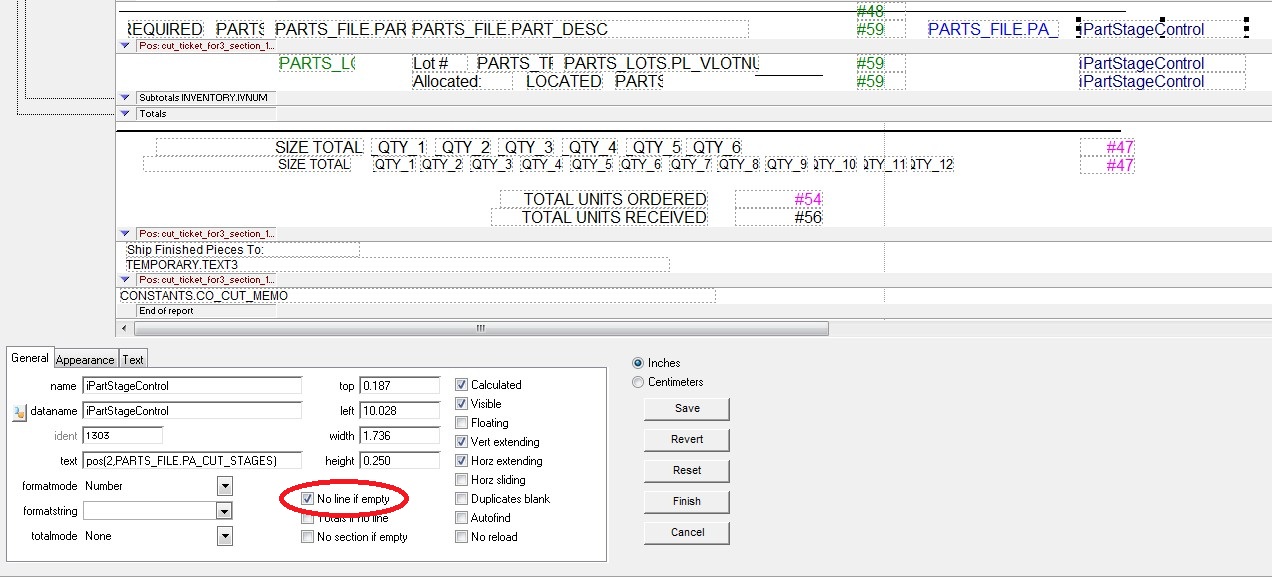
Scroll down until you see the iPartStageControl fields on the right.

Select the first iPartStageControl field and change the number to the stage you want to print, in the “text” field. For instance, this example
will print only components marked as Stage 2, thus the number 2 was placed after the “pos(” characters in the “text” field. If you wanted to print
stage 4 components you would enter the number 4 instead of 2. Note that this particular step does not need to be repeated for the
second and third iPartStageControl fields.
Next, place a check in the “No line if empty box” (do this for the second and third iPartStageControl fields as well).

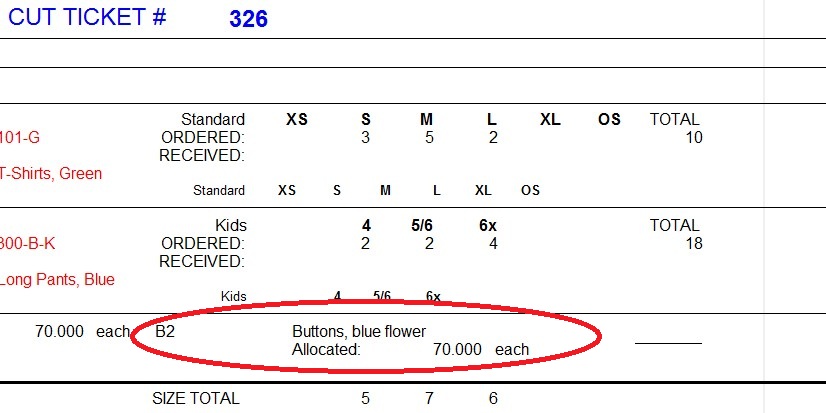
Click the Finish button. Then select the variation you just created and click Print. Only the components that match the stages will print.

Copyright © AS Systems, All Rights Reserved | WordPress Development by WEBDOGS