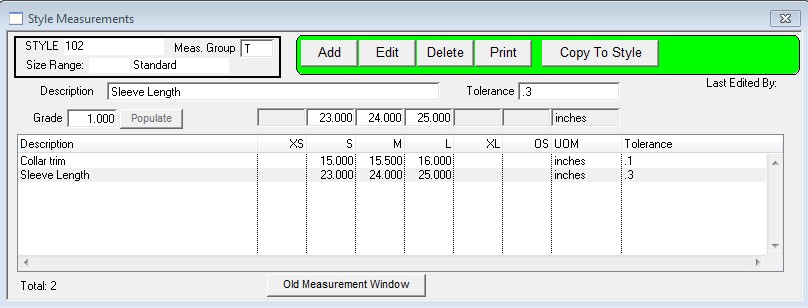
This guide will refer to the “new measurements window”. If your Measurements window looks different than the one in this guide, you can access the new window by pressing the “New Measurement Window” button. Alternately, you can set the new window as the default via Inventory > Preferences, place a check in the box next to “Use the new style measurement window”.
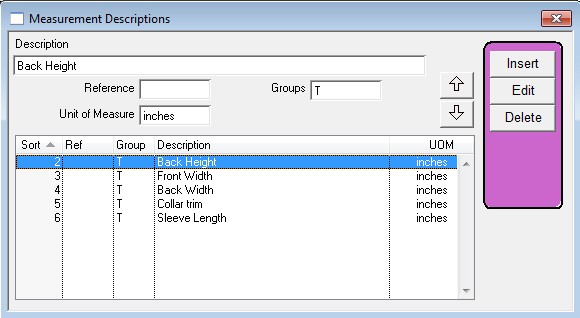
To start using measurements you first need to define your Measurement Descriptions via Inventory > Definitions > Measurement Descriptions. Fill in the Description, Unit of Measure, and Groups (i.e. Shirts, Pants, etc.). You do not need to fill in the Reference field.

After you have defined the Measurement Descriptions you can then add the Measurements to a style from the Stylemaster via Other Data > Measurements.
To add a measurement press the Add button and enter the Description (based on the descriptions you defined earlier), Tolerance (acceptable variation), and values for the size slots. *Note, if you enter a value in the Grade field then enter a value in the first size slot and press the Populate button, the rest of the size slots will automatically fill in based on the grade value.

When done press OK. Repeat the process to add more measurements.
Copyright © AS Systems, All Rights Reserved | WordPress Development by WEBDOGS