
The Perfect Fit Library file. This file controls the user interface, data processing, and contains definitions for menus, reports, and windows.
Download the Perfect Fit Library file (requires user name/password). You may see several library files on the download page. The numbers in the name of the library file denote the date released in yy/mm/dd format. Download the latest Library File that pertains to the Omnis version you are using (4.2 vs 4.3) and save to your desktop. Do NOT “Run” from the web page.
http://www.perfectfit.net/pf7/pf7library/
Download the Perfect Fit Opener file. The PF Opener File simplifies the upgrade process in 2 ways:
To install the PF Opener File, follow the instructions on this page then return back to this wiki entry to finish installing the Perfect Fit Library file.
Unzip the library file.
Different computers may have different software for unzipping files.
You can usually double click the Zipped file, and in the window that opens, right click the PF7 file, and select COPY.
Navigate to the C Drive and then to your PFIT folder (Create the PFIT folder if it does not already exist).
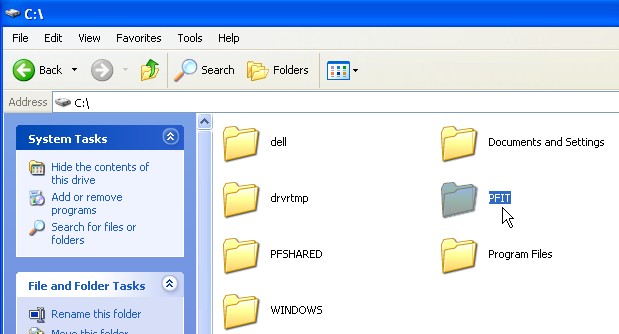
Go into the PFIT folder, right click on an empty area and select “Paste”.
Then repeat steps 2 – 4 with the PF Opener file.
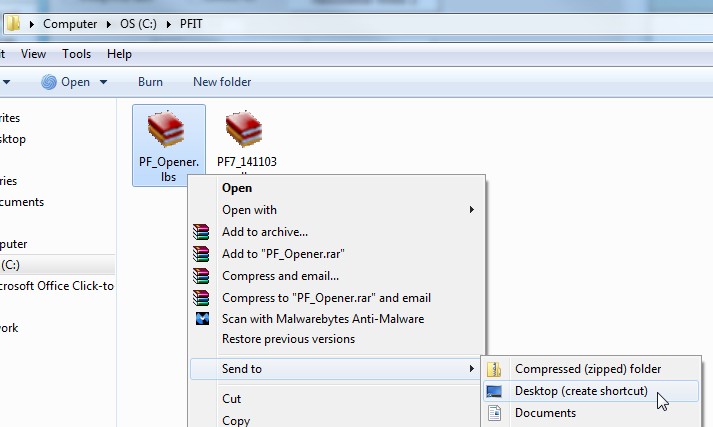
Right click on the Perfect Fit Opener file and select “Send To” then select “Desktop (create shortcut)”. Note that your version of Windows may use a different naming convention but the shortcut procedure will be similar.
Close the PFIT folder and return to your desktop. You will see the PF Opener shortcut on the desktop.
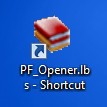
You are now finished with the installation of the library and opener file.
Double click the shortcut on your desktop to run Perfect Fit. Because this is the first time you’re logging in you will receive a message that Windows can not open the file. Click the “Select the program from a list” option and press OK. In the next window click the “Browse” button. You will then see a list of folders.
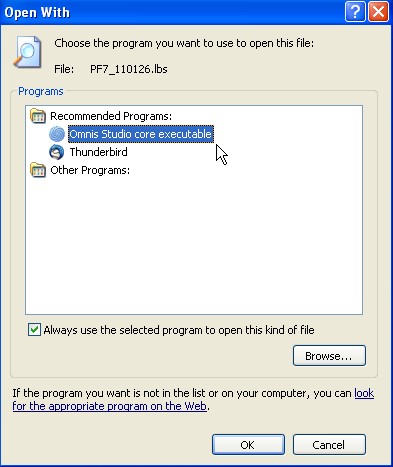
If you are using Omnis 4.2 Find the “Raining Data” folder and double click it. In the next window, double click the OS42 folder. In the next window you will see an “Omnis.exe” file. Highlight the Omnis.exe file and click the “Open” button. You will now be returned to the previous “Open With” window and you will see a list of programs. The Omnis file will be highlighted.
If you are using Omnis 4.3 Find the “Tiger Lofic” folder and double click it. In the next window, double click the OS432 folder. In the next window you will see an “Omnis.exe” file. Highlight the Omnis.exe file and click the “Open” button. You will now be returned to the previous “Open With” window and you will see a list of programs. The Omnis file will be highlighted.
Put a check in the box for “Always use the selected program to open this kind of file” and press “OK”.
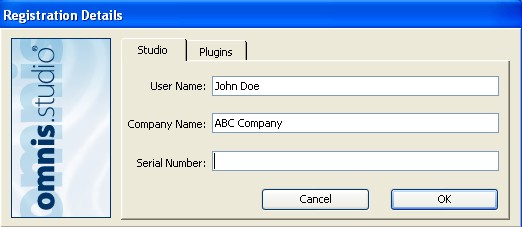
You will then be prompted to enter the name of the user, company, and serial number. When done press “OK”.
You will receive a series of prompts during the initialization process. Click “Yes” and/or “Ok” to all the prompts. At the end a diagnostic report will run and will automatically be saved, as a text file, in a “Diagnostics” folder on your desktop.
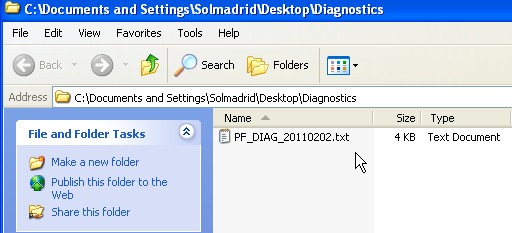
Email the diagnostic file to us at: diagnostics@perfectfit.net
Congratulations, Perfect Fit is now installed and ready for use! If this is the first time you are installing please contact AG Systems for the Initial Registration codes.
Revised 8/23/2017-SV, 12/1/2017-GE
Copyright © AS Systems, All Rights Reserved | WordPress Development by WEBDOGS