Click the small “ABC” icon in the top right of the menu bar.

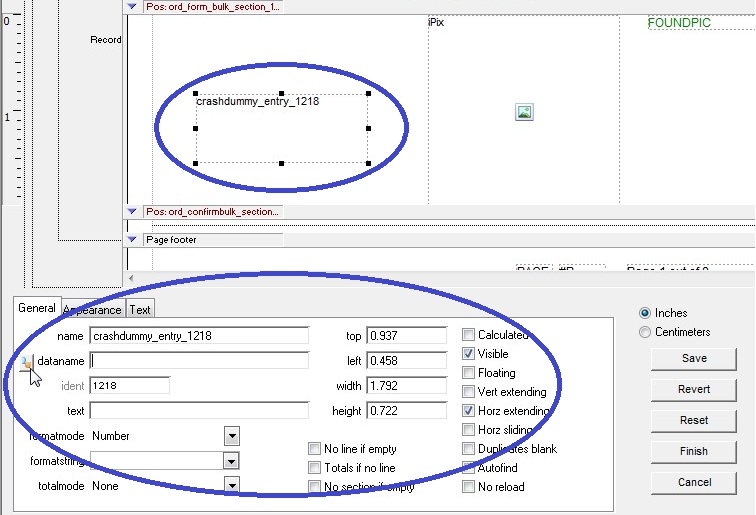
You will now be in entry mode. Choose a spot on the form to enter your field. Then left click your mouse and hold the button down while dragging the mouse and drawing a box on the screen. When you release the left mouse button you will see the outline of a box, which is the Data field (seen in the small blue oval). In the bottom left of the Form Editor window you will see the properties of the Data field you just created (seen in the large blue oval). Note that place holder text is automatically inserted as “crashdummy_entry_xxxx”. You can delete the crashdummy text from the properties Name field (in the General tab) and replace it or you can leave it blank.

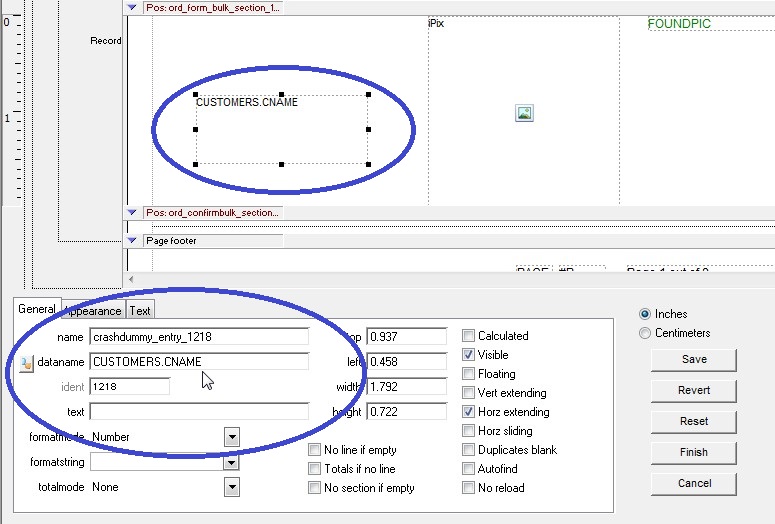
To call data into the field you just created you will need to enter the corresponding name in the “Dataname” field. To do so, click the hand with magnifying glass icon (next to “dataname”) then select the corresponding table and field. Alternatively, you enter the data manually by placing your cursor in the “Dataname” field of the General tab and enter the full name of the field. For instance, to display a customers name in that field you would type “CUSTOMERS.CNAME” (see screenshot below). Once you’ve entered the name hit the “Tab” key on your keyboard and the Dataname will populate in the field you created.

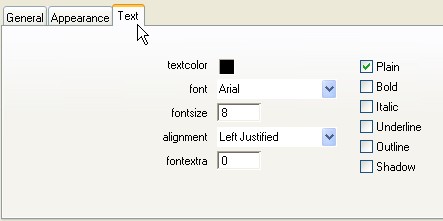
Font settings can be altered via the Text tab.

Repeat the above process as necessary to create additional Data fields. When you’re finished press the “Finish” button to save your progress and exit the Form Editor. Alternately, you can press the “Save” button to save your progress and continue working in the Form Editor.
Copyright © AS Systems, All Rights Reserved | WordPress Development by WEBDOGS