There are a number of different approaches to tracking Factored invoices in Perfect Fit.
This method enables the user to track the customer’s payments to the factor.
Make sure the Factored checkbox is checked on the invoices when inserting invoices.
1. Set up required Ledger Accounts
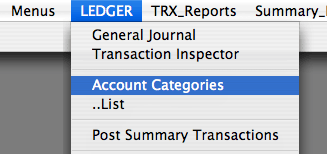
Go to Menu > Ledger
Ledger > Account Categories
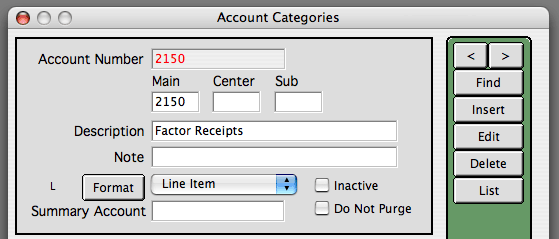
Insert (or Find) the Factor’s Receipt Account, under the liability (2000) section.
This can also be labeled Factor Loans, depending upon your arrangement with the factor.
We will use Account 2150 as the example here.
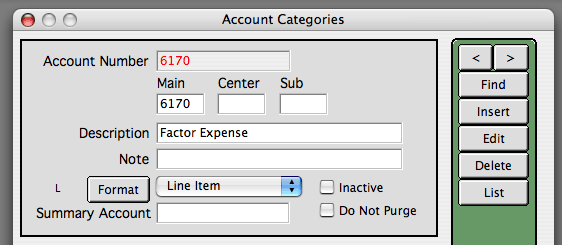
Insert (or Find) the Factor Expense Account.
This will record the Factor’s fees.
2. Enter Factor’s Receipt Statement
Your factor will send you a statement showing which invoices they have received payment for.
This step will update the invoices in PERFECT FIT, showing they have been paid.
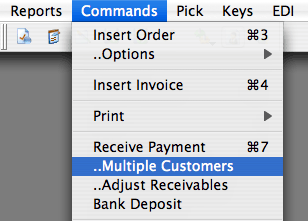
Go to Menus > Invoices
Commands > Multiple Customers
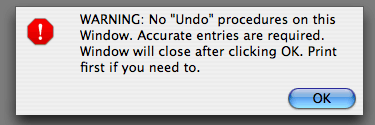
Please read the Warning message.
This step requires careful data entry.
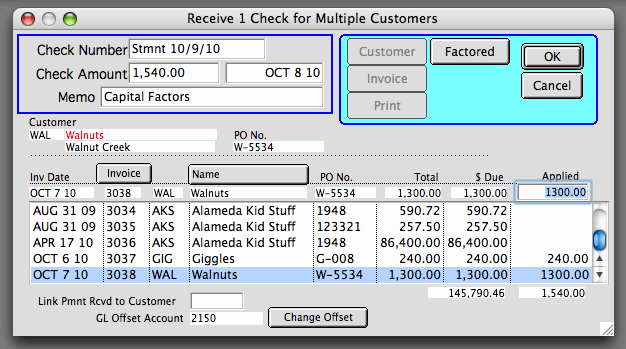
The window “Receive 1 Check for Multiple Customers” will open.
The meaning of this window is a bit different for factor processing, so don’t worry about the name.
Click the Factored button to display only factored invoices. (Optional, but makes it easier.)

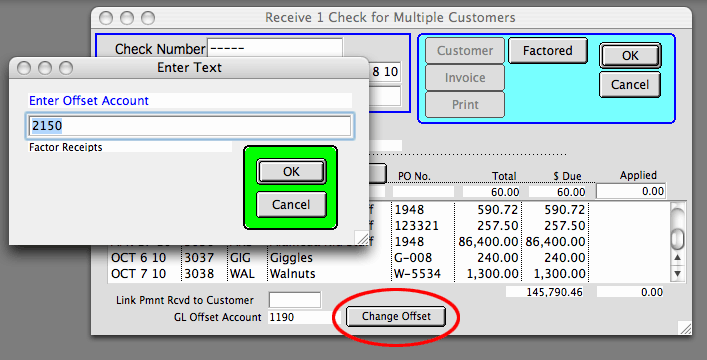
At the botttom of the window, click the Change Offset button.
Enter the Factor Receipts account, and tab to display the description to check that you have the right ledger account.
Click OK to return to the Receive… window
In the Check Number field, enter the Factor’s statement number or date.
In the Check Amount field, enter the total amount the factor has received from your customers.
In the Memo field, enter the Factor’s name.
Double click each invoice in the list that has been paid per the statement.
If a partial payment has been received you can override the Applied amount when the invoice line is highlighted.
The total Applied must equal the “Check Amount”.
Check your entries, and click OK to process the invoices.
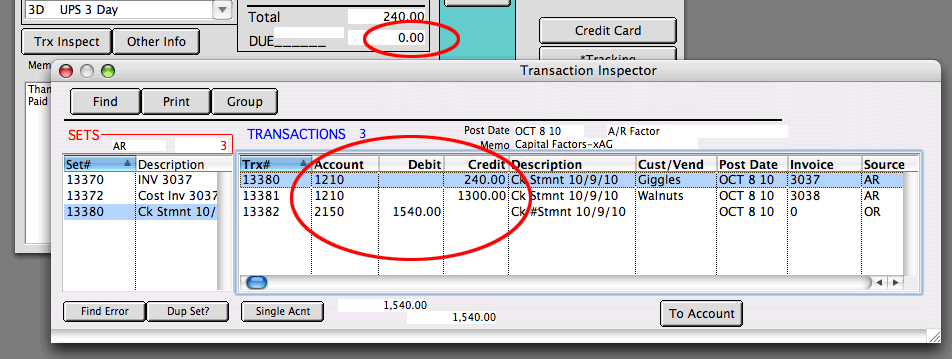
Invoice that have been paid in full will show a zero due.
The transaction set that was inserted will show the Credit to Factored A/R to reduce the A/R balance,
and a Debit to the Factored Receipts Account.
3. Enter Check Received from Factor.
This assumes that the check is less than your customers paid the factor, and the difference is the factor’s fee.
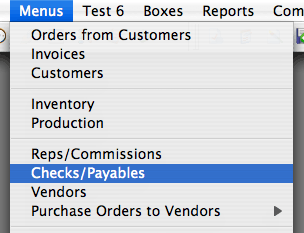
Go to Menus > Checks/Payables.
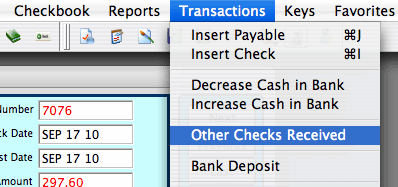
Go to Transactions > Other Checks Received.
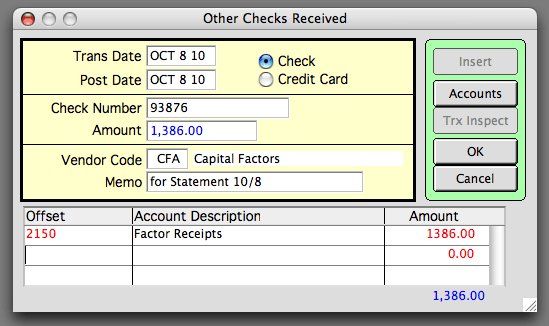
Click Insert on the Other Checks Received window, and enter the information about the check.
The Offset Account will be the Factor Receipt Account.
For best tracking, the factor should be set up as a Vendor so it can be entered on this window.
4. Enter the Factor’s Fee
Go to Menus > Ledger
Go to Ledger > General Journal
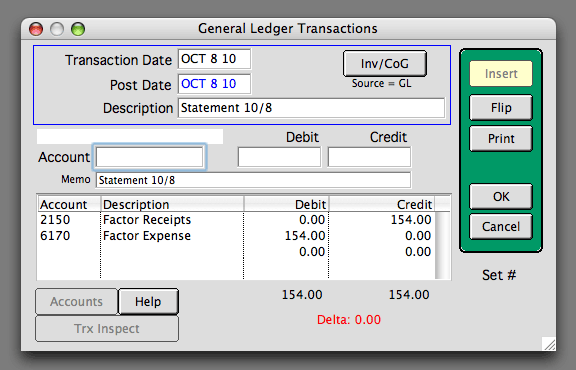
Click Insert and enter as below.
The Description should refer to the Factor’s Statement.
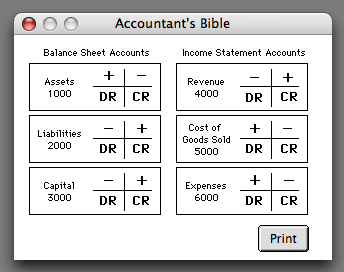
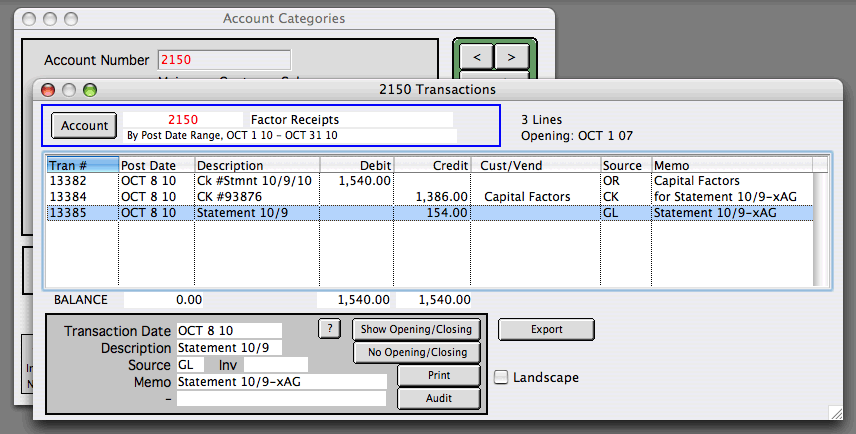
The Factor Expense will be DEBITED, as that increases the expense for your financial statements.
Therefore, the Factor Receipts account must be CREDITED to balance the entry.
The Accountant’s Bible shows that the Expense category must be Debited in order to increase it.
This window is available under Ledger > Help
The Detail History of the Factor Receitps account will now balance to 0.00 after doing the steps above.
The End.
Copyright © AS Systems, All Rights Reserved | WordPress Development by WEBDOGS